PlatformIO Notes

PlatformIO is a nice IDE for Arduino that allows you to specify environments and upload sketches via the command line, but more importantly it has code completion and real-time code inspections, which the default Arduino IDE doesn’t have – HOW DOES ANYONE CODE WITHOUT CODE COMPLETION OR INSPECTIONS???
Note: PlatformIO is an extension to existing editors, and there are a few different editors it can run on top of. The recommended editor is VS Code, and that’s the one I’ve found to be the best.
Directory Structure
When you initialize a new platformio project, you’re given a structured set of directories and files that the IDE uses to compile and upload your code properly. Here’s the default structure:
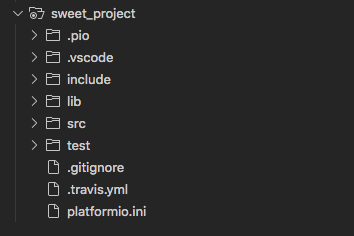
.pio/can mostly be ignored.vscode/is where vscode stores its bookkeeping information; it can mostly be ignoredsrc/is where sketches are keptlib/is where libraries are keptinclude/is where custom headers are keptplatform.iniis where environments are defined
Some of these are intialized with a README containing more info on how to use them.
Environments
Environments are defined in platformio.ini, where you specify the board to upload to, the libraries to use, the serial port, and other things. Here’s an example of two environments, one for an UNO running a radio receiver and one for a Nano running a radio transmitter:
[env:receiver]
platform = atmelavr
board = uno
framework = arduino
upload_port = /dev/tty.usbmodem14211
monitor_port = /dev/tty.usbmodem14211
monitor_speed = 115200
lib_deps =
  SPI
  RF24
targets = upload, monitor
src_filter = +<receiver.cpp>

[env:transmitter]
platform = atmelavr
board = nanoatmega328
framework = arduino
upload_port = /dev/tty.usbserial-12DP0634
monitor_port = /dev/tty.usbserial-12DP0634
monitor_speed = 115200
lib_deps =
  SD
  SPI
  RF24
targets = upload, monitor
src_filter = +<transmitter.cpp>
Properties are mostly evident by their names, except maybe targets and source_filter. targets are the things to do when the environment is run (more on that later), and source_filter selects which cpp sketch in src/ to upload to the board. Usually you’ll just have one sketch called main.cpp, in that case source_filter isn’t necessary, it’ll upload main.cpp by default, but if you want to give the sketch a different name, or if you have multiple sketches in src/, then you need to set source_filter so platformio knows which one to upload. Note the weird syntax.
Using Libraries
To use a library, download it via platformio’s built-in package manager, then put the package name in lib_deps, and include the header file in your sketch. If you want to use a custom library, such as something from github, download it directly into lib/ and follow the instructions in lib/README.
Custom header files can be added inside include/. I’ve found this useful for defining constants that are shared by multiple sketches.
Using the CLI
Platformio has a nice CLI for uploading code. I’ve found these two commands to be the most useful (run from the project folder):
$ platformio run --environment <environment_name>
$ platformio device monitor --port <port> --baud <baud>
The first command runs the corresponding environment and does whatever’s specified by src_filter in platformio.ini. In my case, platformio uploads the sketch and then immediately monitors on the port. If monitor isn’t in src_filter, you can still monitor using the second command.
Troubleshooting
- If platformio isn’t able find references to libraries even though they’re definitely in the right place, then delete
.vscode/and restart the editor.